Gift-giving is a heartfelt way to show someone you care, and what better way to make it special than by creating your own gift box? A DIY paper gift box is not only eco-friendly but also adds a personal touch to your present. Whether it’s for birthdays, holidays, or just because, this simple paper gift box is easy to make and requires minimal materials.
Let’s get started!
Materials You’ll Need:
A sheet of sturdy paper or cardstock (any color or pattern you like)
Scissors
Scalpel
Ruler
Optional:
Decorative items (optional: ribbons, stickers, or stamps)
Glue or double-sided tape
Step 1: Choose Your Paper
Select a piece of paper that’s thick enough to hold its shape but still easy to fold. Cardstock or scrapbooking paper works perfectly. If you want a festive look, choose patterned or colored paper.
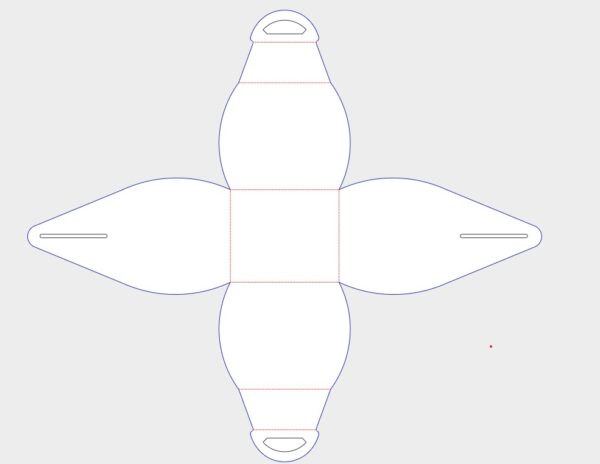
Step 2: Print the template
Print the template on A4 or A3 size paper, depending of the box size that you want.
Step 3:
Place the template on the paper from which you will make the box and fix it with a paper clip or self-adhesive tape
Step 4: Cut and Assemble
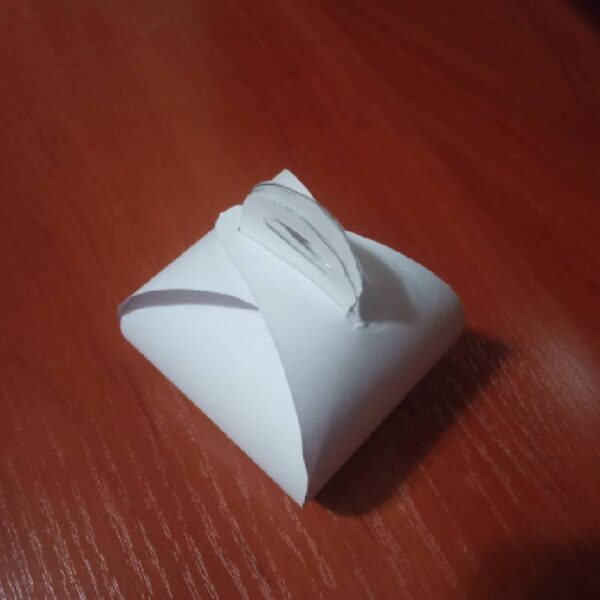
With scissors cut the paper according to lines on the template. Cut the holes carefully with a scalpel.
Fold the flaps inward following the lines on the template and assemble. The finished box should look like in the picture.
Optional:
Step 5: Decorate Your Box
Now comes the fun part! Personalize your gift box with ribbons, stickers, stamps, or even hand-drawn designs. You can also write the recipient’s name or a special message on the lid.
Tips for Success:
Use a ruler for crisp, clean folds.
If you’re new to box-making, practice with scrap paper first.
Experiment with different paper sizes to create boxes for various occasions.
Why Make Your Own Gift Box?
Creating your own gift box is not only cost-effective but also allows you to tailor it to the recipient’s tastes. Plus, it’s a sustainable alternative to store-bought packaging. Whether you’re wrapping a small trinket or a handmade gift, this DIY paper gift box is sure to impress.