There are several things you should understand about tree removal. You can check out our guide here to learn more about how to remove a tree form your yard.
While by name removing a tree may sound like a simple task, figuring out how to remove a tree requires a great deal of planning and a great deal of work. Much of this work is to ensure that no injuries happen and that you can clear the area in a safe manner.
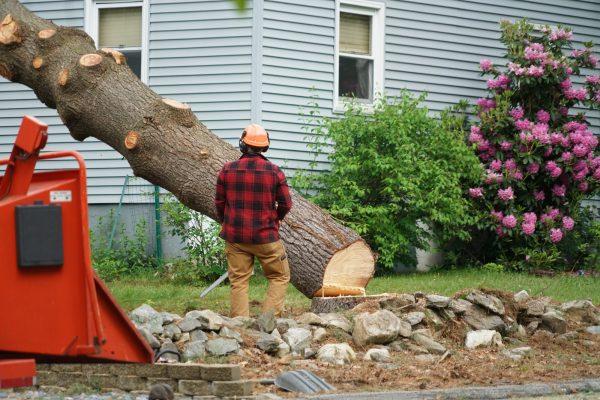
Time to fell a tree in a quick and safe manner!
Beginning The Process
A day before you are planning the full removal of the tree it is wise to water the surrounding soil. With softened soil, you can pull apart the root structure with ease. This will make it less of a struggle when it comes time to pull up the stump after clearing off the branches and dropping the tree itself.
Clear it Out
The process begins as you would expect, by clearing the work area. This is more than simply getting yard items out of the way and clearing things out of the yard, however. You need to determine a radius for the tree when it falls. This can be done by gathering an estimated height for the tree and from that, measure the distance on all sides. It is wise to give a few additional feet on top of that measurement. When establishing these measurements you need to also determine the best paths of escape should something go wrong, they should be on each side of the tree as the fall can unexpectedly change directions.
Inspect Before Cutting
After you measure the work area and clear it out you need to evaluate the condition that the tree is in. Certain things like “open wounds” can be indicative of deeper issues like a hollow or rotten core.
Cut 1: Undercut
The best way to describe this cut is an “aim slot”. This is a v-shaped cut made to point the tree in the direction that you are looking to have it fall. It is a relatively deep cut with an angle of approximately 70 degrees. The ideal depth of cut is 1/6th of the width of the tree. It forms the first part of the hinge point that the tree will fall at.
Cut 2: Backcut
This is a straight cut a small distance, approximately two-inches, above the undercut wedge. You need to do the best you can at keeping the cut flat. The flatter the cut the more controlled the fall will be. The cut releases the pulling stress on the trunk and initiates the fall. It is important to make sure that you never place the Backcut below the undercut as it will change the effect of each of the cuts. If you do that you will easily lose control of the falling tree and could cause serious injury.
Get to Limbing
It’s time to create a clear log. You are going to be clearing all the limbs and extra items from the felled tree. What is important is that you start on the opposite side of the tree from where it fell, never cutting on the same side that you are on. If any of the limbs you cut were holding the tree in place, you could potentially get caught under a rolling tree otherwise. Another major safety concern to be aware of are “spring poles” these are small trees that have been entangled in the larger tree or that have been trapped by the fallen tree. These have a large amount of potential energy and if they are released without warning can cause a huge amount of damage.
We’re Stumped
Depending on the size of the tree that you are removing there are several options when it comes to removing the stump once the majority of the tree is taken care of. There are four major strategies to pursue depending on the size of the stump, the resources at your disposal, and regulations in your area.
Dig it Out
This option is the most straightforward but can also be the most time consuming and very labor-intensive. Also physically digging out a remaining stump by hand is generally limited to only the smaller of trees. You will begin by digging a perimeter around the stump mass itself. After exposing more of the stump and the root system, take a pruning saw and/or an ax and begin to cut at the roots. By cutting these you will be able to work the mass out of the ground. Leftover roots make a great base for a compost pile.
Burn Out the Remains
Depending on the regulations surrounding fires in your local area this is another effective, relatively easy, option. You can set this up just as you would set up a large campfire or bonfire. Be sure to keep the fire burning until the stump is completely burnt out. There may be remnants that need to be shoveled out with the ash that is left behind but it can be easily removed from the hole now. Be sure to keep a fire extinguisher on hand in case of an emergency.
Stump Remover
The easiest of the methods, outside of calling a professional in to do the job for you. The trade-off is that it takes an extended amount of time, approximately 4 to 6 weeks, and additional supplies to use this method. Begin by drilling anywhere from 4 to 8 holes well spread out into the stump, depending on the size. Add stump removal chemicals into each of the holes and simply let the chemical do its work. It is important to check each manufacturer’s instructions as they can change concerning time between pouring the chemical and removing the stump.
Stump Grinding
Stump grinders are available for rental from most any home supply and repair stores if you do not own one. The idea is to center the grinder over the stump and begin using the machine. Continue in a circular pattern around the stump until you have ground the entire piece down. After finished, use a shovel to clear out the remaining chunks and refill the hole with fresh dirt. Some people also leave the stump and incorporate the wood into the design of the yard. Be creative! It can allow for a natural blending of outside art and the earth in your yard. Of course, if these options are not workable or you still are having doubts about your safety there is always the option of contacting a tree removal specialist. Get in touch with TreeTrim KC today and see what they can do for your cleanup needs!
On a Path to Easier Tree Removal
Figuring out how to remove a tree is only one side of a quality refurbishing to your home and your property. There are a variety of things you can do to put a fresh appearance on the place you call home.
From the interior to exterior, garden, and beyond, the LetsRenovate blog has topics for every project that can put a new shine on your home. Stop by to get some more wisdom on how to refurbish and revitalize!